Upgrading e-bike hub motors
Written on October 23rd , 2023 by Jonathan Hilgart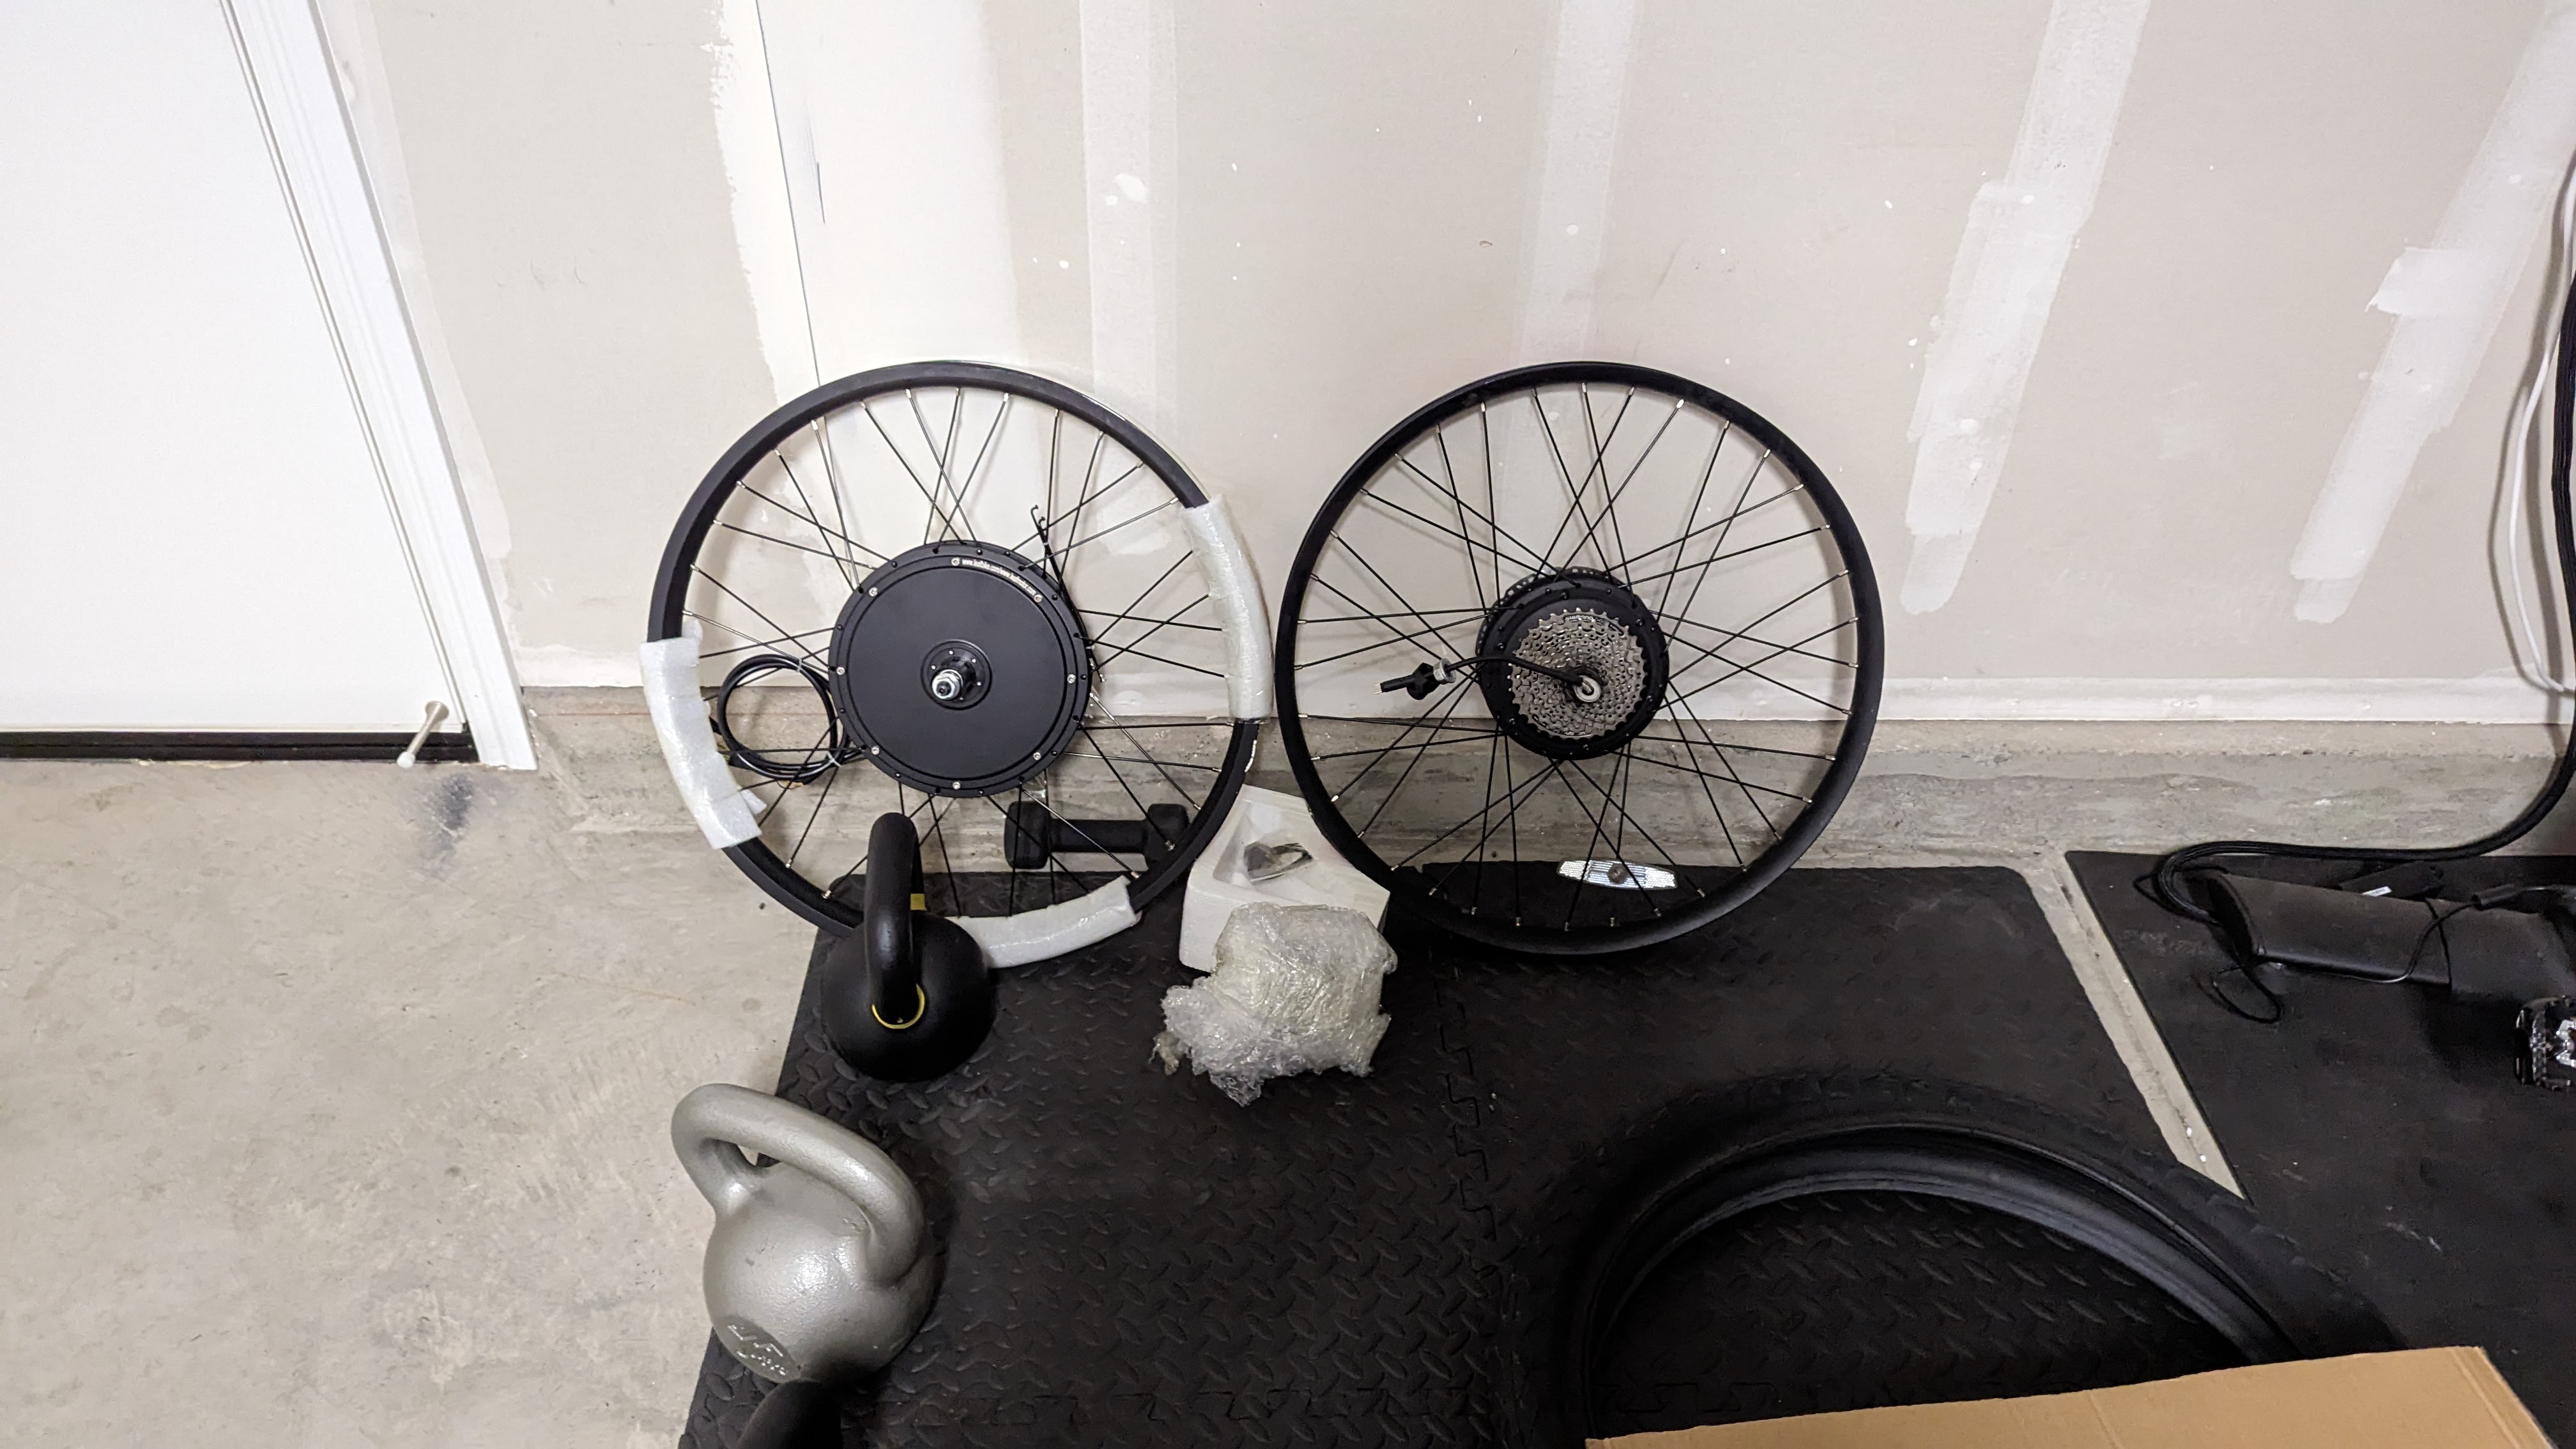
This is a short article about my experience upgrading the rear hub motor of the Ride1up Cafe Cruiser. Overall, it’s a great bike, but since I was commuting 15+ miles each way to San Mateo I needed something with a little more oomph. Therefore, I set out to upgrade my motor from the provided 500w motor to a 1500w motor. You can see the difference from the photo of this post with the 1500w motor on the left and 500w on the right.
In general, I learned there are four components to make an e-bike go fast fast fast.
- 1) Motor capacity and voltage
- 2) Controller max amps
- 3) Motor max wattage
- 4) Battery capacity.
The general formula is (battery voltage * controller max amps = watts delivered to your motor). If the watts delivered to your motor « the max rating for your motor, you can upgrade your battery/controller. If the watts delivered is » the max rating on your motor you can consider upgrading your motor. Although, most modern motors can run 25-50% higher than the max watts rating.
For this project, I decided to take on a full rebuild, not recommended, and upgrade the battery, display, controller, and motor for the bike. Here are the things I learned but the biggest was there are no standards for ebikes. Every manufacturer will attach their wires in different ways!.
- 1) Ebike batteries are particular to the brand of bike you have in order to fit. For the Cafe Cruiser, I was fortunate enough to find a seller on DHGate that had more powerful batteries for sale. Pop in it and you are good to go. Easy.
- 2) Controllers only work with certain displays. Therefore, it’s difficult to one-off buy a controller. Rather, you typically need to buy a display+controller combo. The most popular brand is KT for controller/displays, but I went with Leafbikes controller shown here.
- 3) It’s important to buy connectors that you know how to use! I went with bullet connectors since they don’t require a soldering gun and you can crimp (with a crimping tool). With that said, you should make sure the bullet connectors are rated for the voltage being sent through your wire!
- 4) You’re going to need to get comfortable connecting different parts of the motor to the controller and testing out different settings. I used bullet connectors, mentioned above, but they took a bit longer to attach since you’re crimping 5-6 wires on each side for hall sensors!
- 5) The motor I upgraded to, the Leaf Bike 1500w motor was advertised as having a 135 mm drop out. This is the spacing between the frame for the rear axle of the bike. However, upon receiving it, I noticed the wheel was actually slightly larger, closer to 140mm, so I needed to dry set or pry apart, the rear frame of a bike with the back of a hammer. It was hard; I wouldn’t recommend this.
- 6) After connecting everything, I was pumped up and ready to go! However, after 5 minutes on the bike, the motor stopped working and I popped my tire :(. Turns out, the way I had connected the motor wire to the controller resulted in a slight knick on the motor wire which cut a hall sensor. There are generally 5 hall sensors that go from the motor to the controller and the motor will not work without these. However, the controller from Leaf Bike, above, is able to work without hall sensors! Yay! Lesson learned; make sure all wires are out of the way of the bike after connecting.
- 7) Make sure to keep all screws, nuts, and old parts! I kept the previous controller and motor which is how I was able to identify that the hall sensors were broken, not the controller!
- 8) PAS, pedal assist, comes with a different number of magnets (6,8,12) as well as different ordering of wires. Also, sometimes there are three wires for PAS and sometimes there are four. Make sure your controller has the correct number of wires. It’s easy to connect 3->3 in the right order. but 4->3 seems harder.
- 9) Find a seller that you can communicate with! I probably emailed Leaf Bike 20+ times with questions on controller compatibility, motor connections, display settings ….etc. It wasn’t the easiest to communicate with a seller based in China, but they were very responsive.
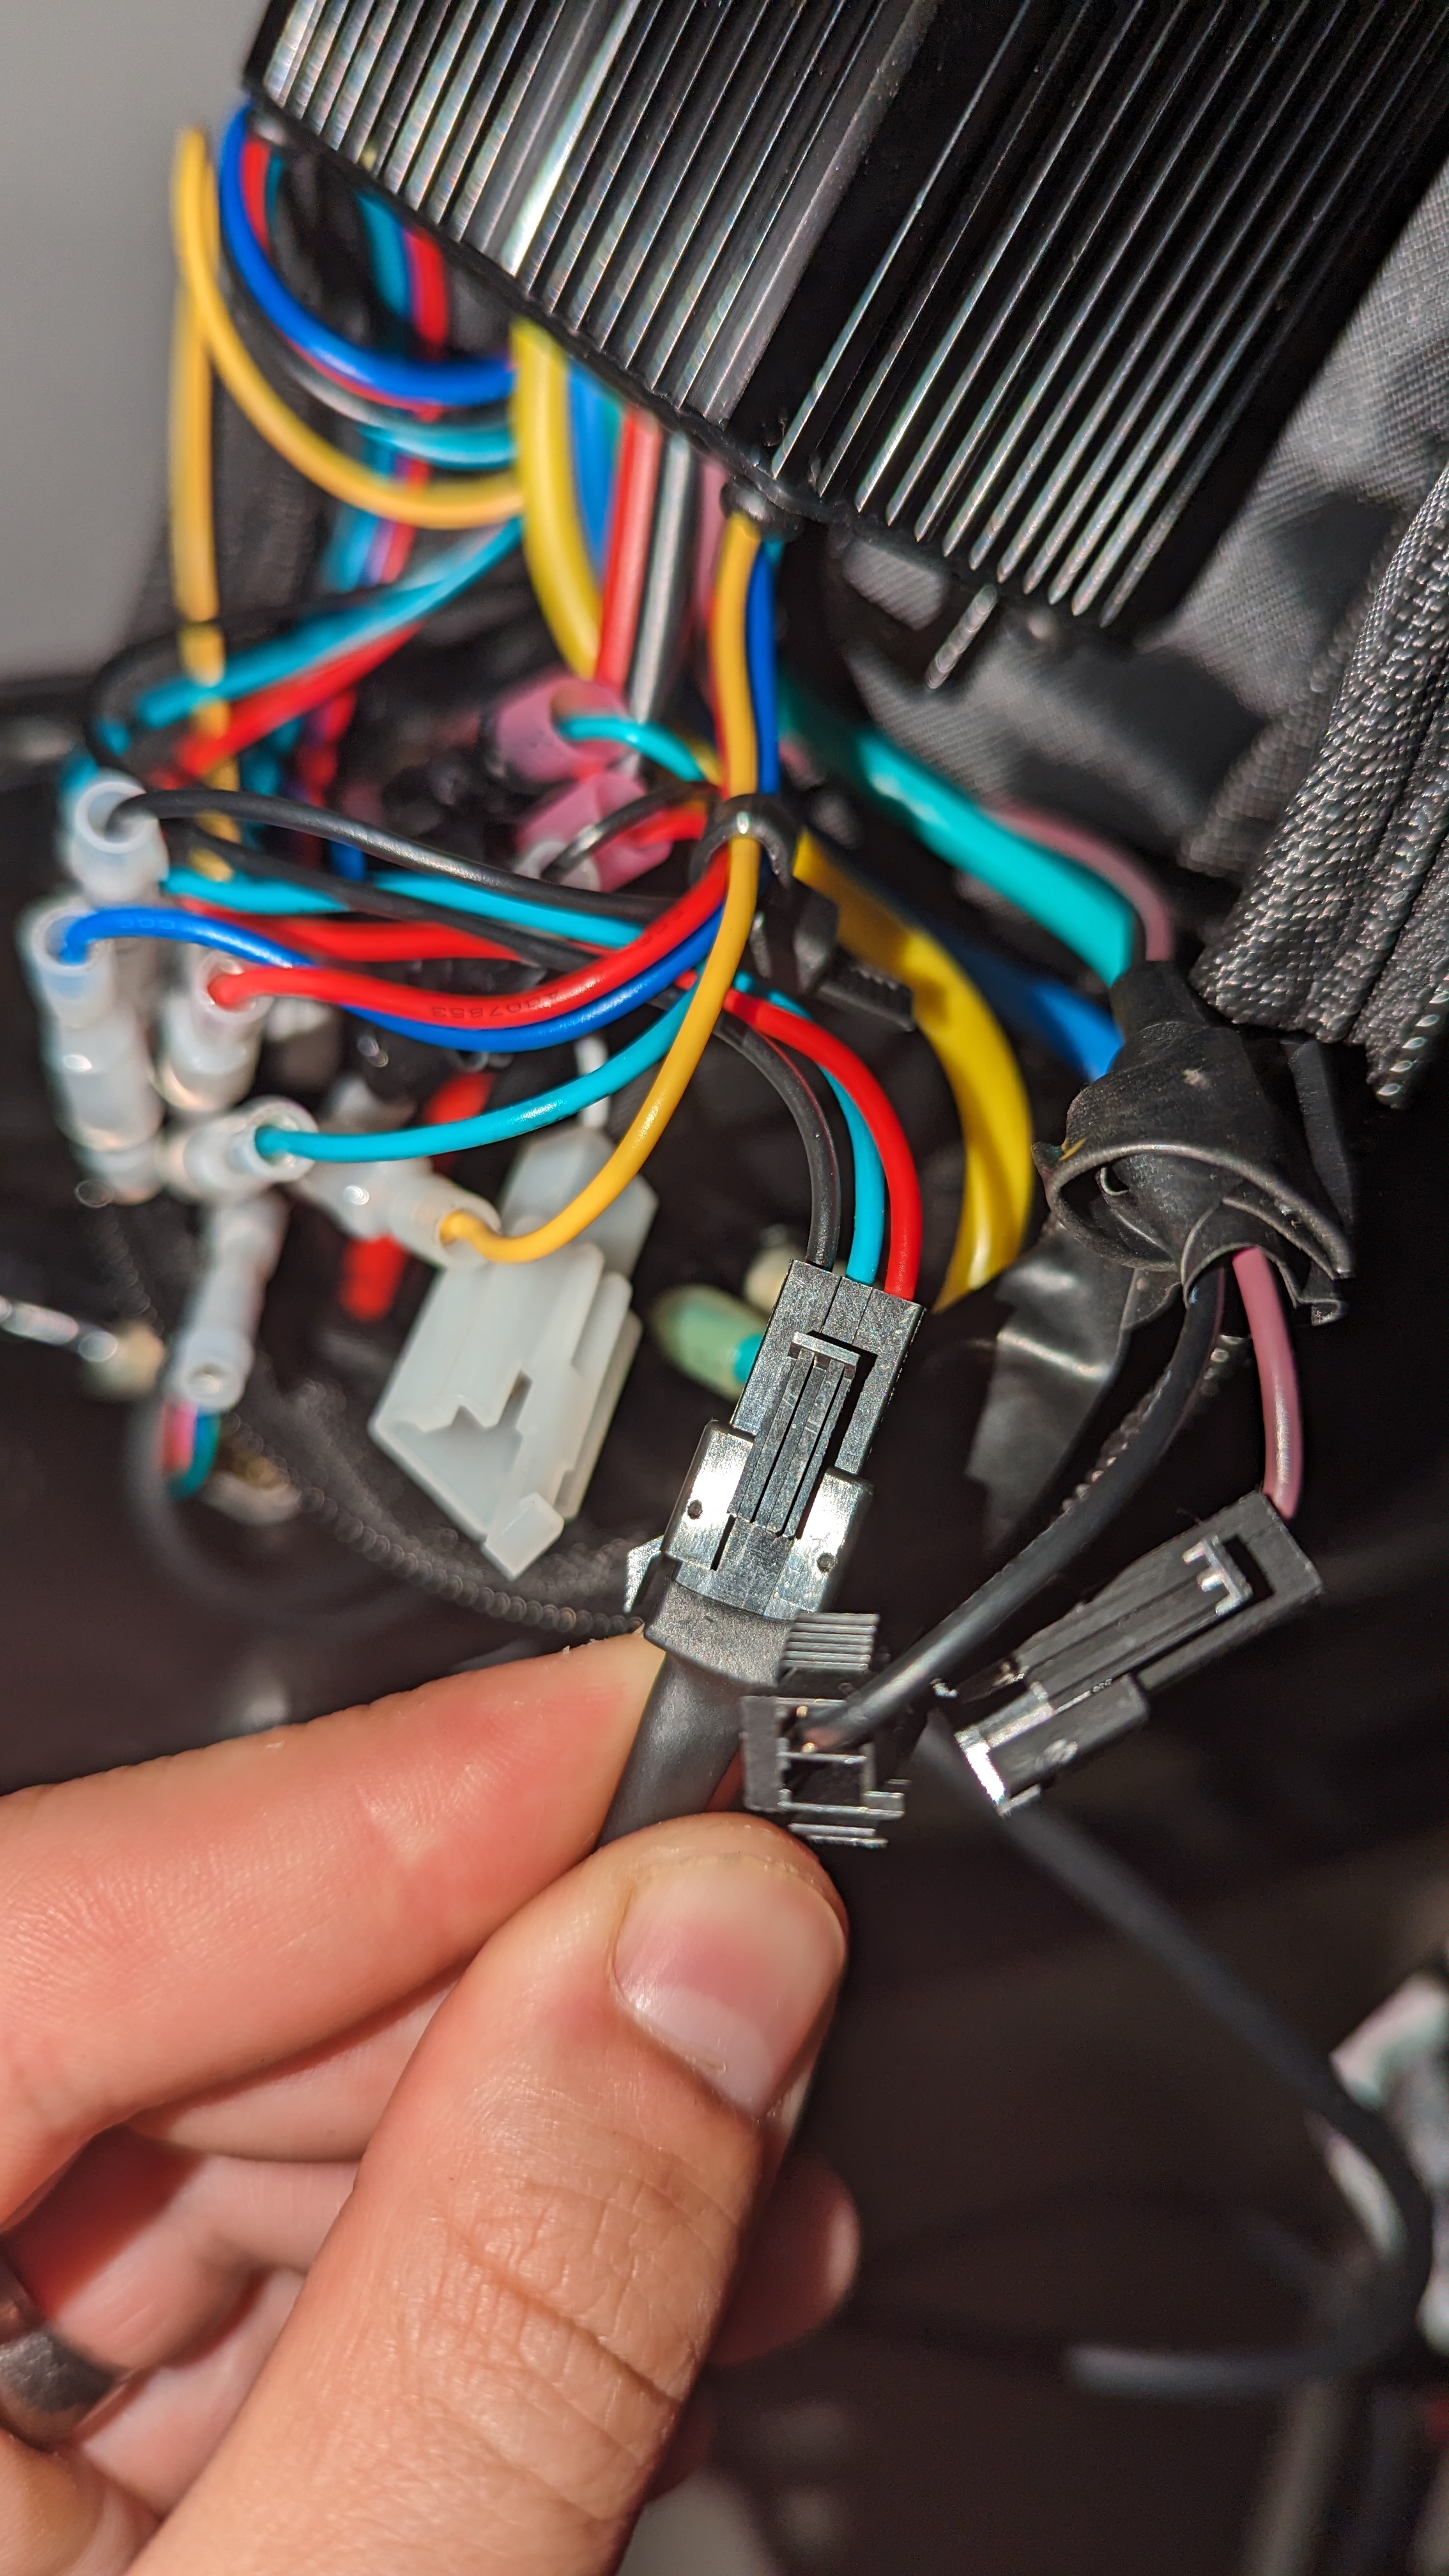
Here’s what the wiring looks like for the new controller. It’s a mess, but an organized mess.
All in all, it took me close to 13 hours and $1,000 to upgrade the motor, display, battery, and controller. However, if I can sell the old setup for $300, we’ll call it a net $700 investment which is significantly cheaper than buying a brand-new bike. Would I do this again, maybe? It’s definitely easier to buy a new bike than rip apart an old one, but I came away from it all with a better understanding of how e-bike electronics work.
I hope this helps someone else! Otherwise, it’s a good reminder for me to not dive into these types of projects head first…